 Hiseeucloud App Docs
Dual-Lens 180° View Security Camera (A047)
User manual for the Hiseeu Dual-Lens 180° View Security Camera (A047, WP04) — appearance, installation, EseeCloud app setup, Bluetooth pairing, camera functions, Alexa, and FAQ.
User manual for the Hiseeu Dual-Lens 180° View Security Camera (model A047-V1.0, WP04). Hiseeu products pass strict test standards before leaving the factory and are certified with CE, FCC and UL.
Please read this manual carefully before using the product and keep it properly.
Appearance Description
Dual-Lens 180° Security Camera (WP04)
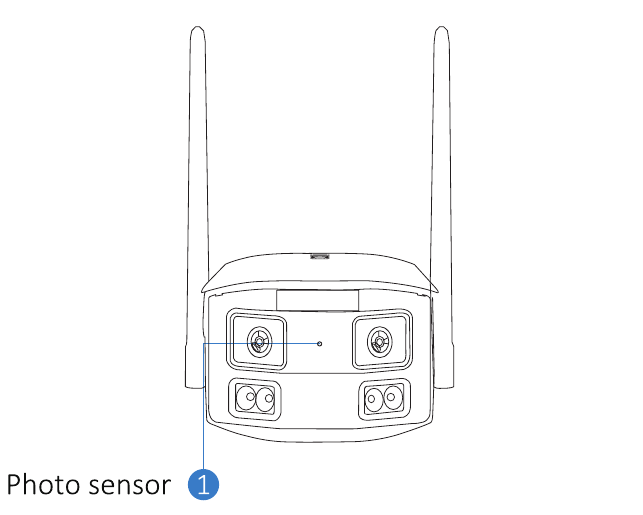
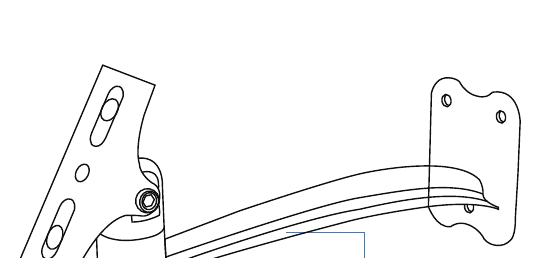
The package also includes a camera mounting bracket and screws:
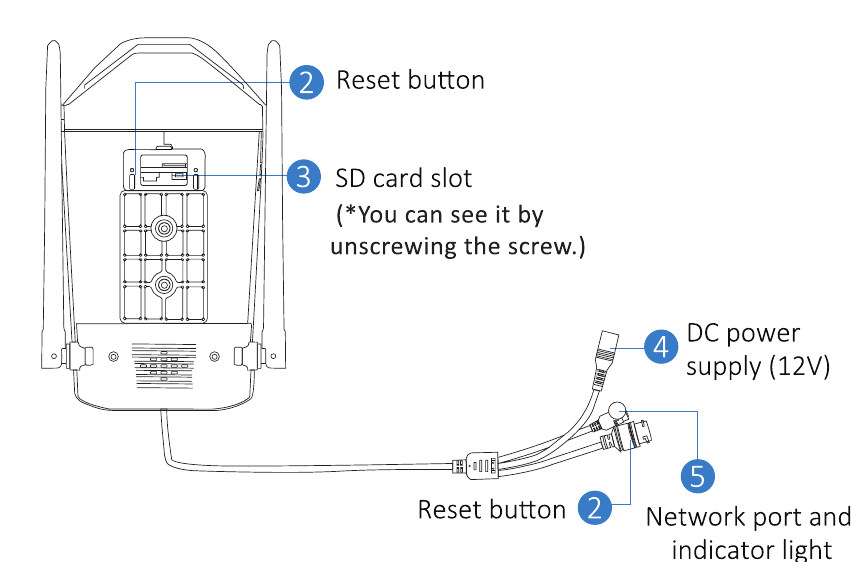
Description
- Reset button: Long press for 3–5 seconds to restore factory settings.
- SD card slot: Install a micro SD/TF card to store video recordings; supports up to a 256GB SD/TF card.
- DC power: Power input.
- Network port and indicator light: Connect the network cable and check the current device status via the indicator light.
- Antenna: Make sure the antenna is vertical when you install the camera outside.
- Audio port: Connect a speaker with a 3.5mm output cable.
Installation
- Ensure that the equipment in the package is in good condition and includes all assembly parts. If you find any accessories missing, please email [email protected] for help.
- The standard power supply is 5V 1A or 12V 2A. Please ensure that your power supply matches your camera.
- During installation, make sure the distance between the camera and the router allows a good Wi-Fi signal.
- Make sure the walls are strong enough to withstand four times the weight of the camera and bracket.
- Make sure the antenna remains vertical and upward after installation.
Add Device
1. Software Download
1.1 Download the EseeCloud app
Search the free app "EseeCloud" in the App Store or Google Play.
The phone app is updated from time to time. If your app menu is different from the menu in this manual, please contact us to get the latest user manual.
For iOS, it requires iOS 9.0 or above. For Android, Android 5.0 or above. For the PC download link, email [email protected].
1.2 Register an account
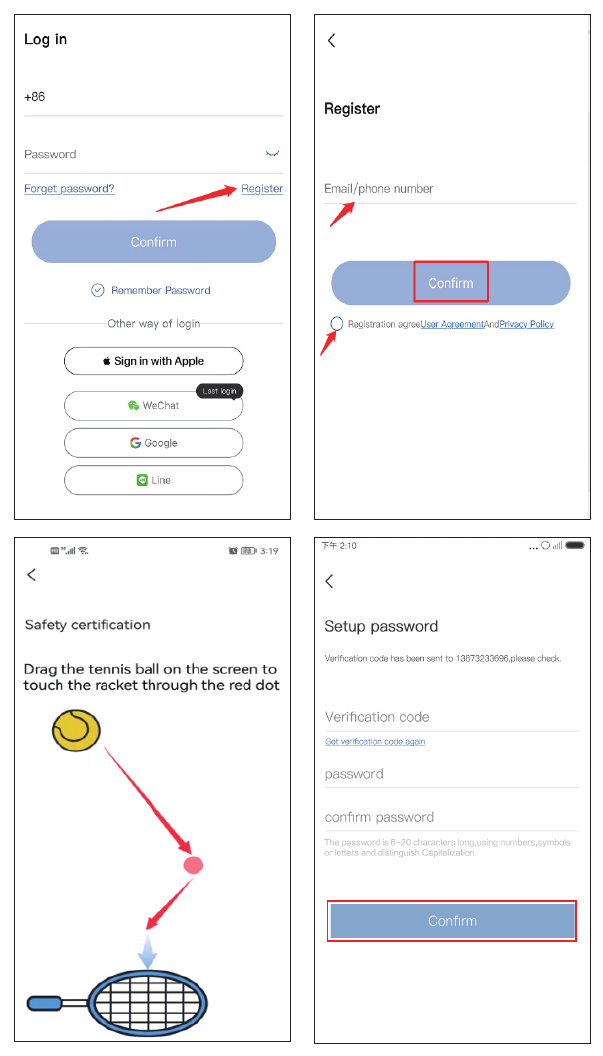
Go to the login interface and tap "Register".
Register with your phone number or email address, check the usage policy below, then tap "Confirm".
Manually press and hold the tennis ball, drag it to the red dot, then drag it to the tennis racket to go to the next step.
You will receive a verification code. Enter the verification code, set up your own password, then tap "Confirm" to complete.
2. Connect the Camera
2.1 Scan the QR code to connect the camera
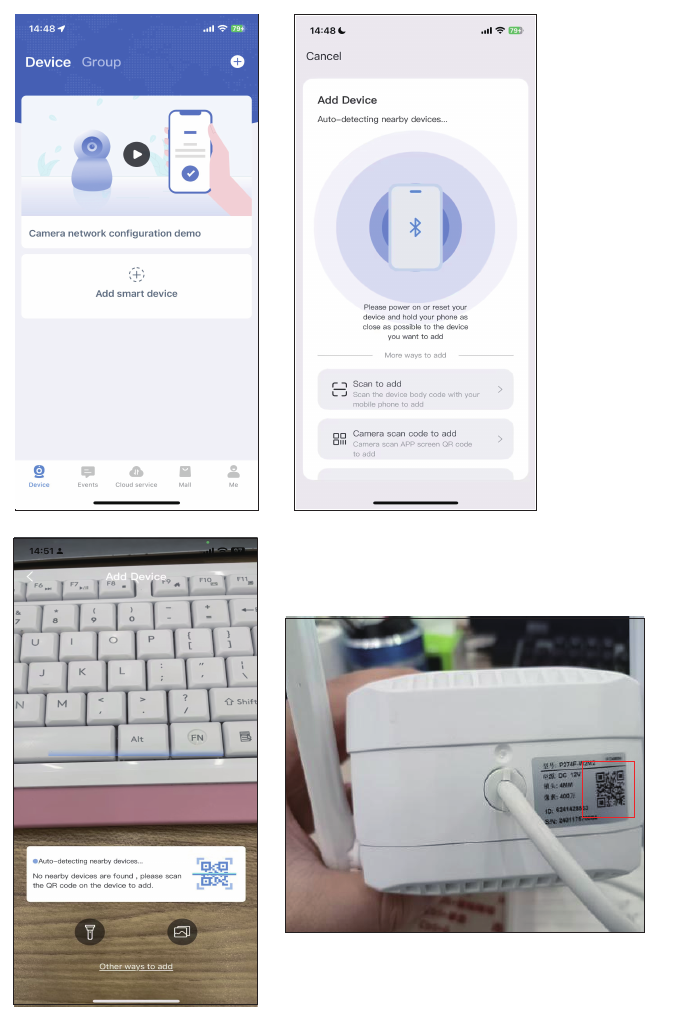
After the camera beeps following a reset, open the app and tap "Add smart camera" → "Scan to add" → scan the QR code stuck on the camera.
A QR code appears on your phone. Aim it at the camera lens at a distance of 15–20 cm. When you hear the prompt voice, tap the blue button below, wait for the device to connect successfully, then edit the device name.
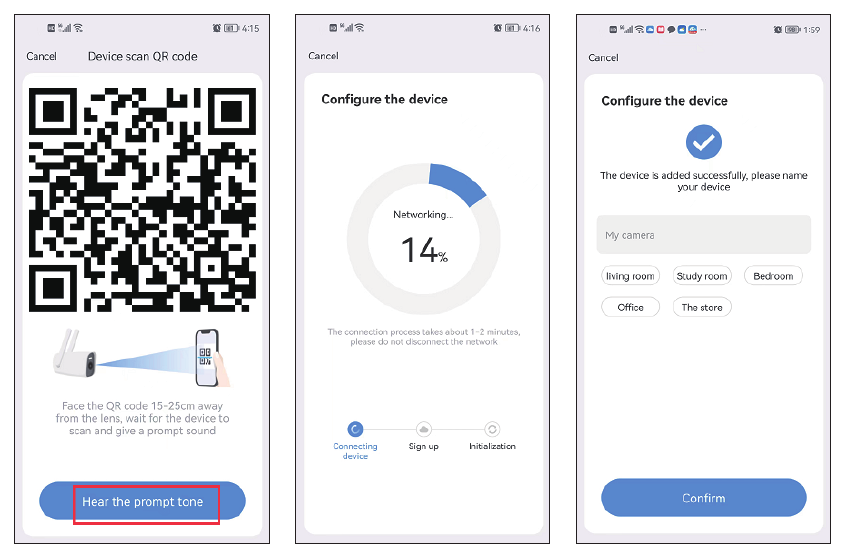
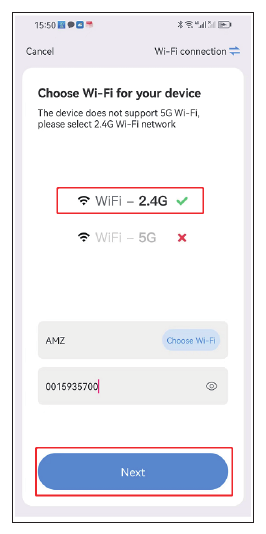
This camera supports both 2.4 GHz and 5.8 GHz Wi-Fi. The Wi-Fi name and password must not contain any special characters, and the Wi-Fi password must not exceed 12 characters.
2.2 Add the camera in the mobile app (Bluetooth)
Turn on the camera.
Tap "Add camera" in your mobile app.
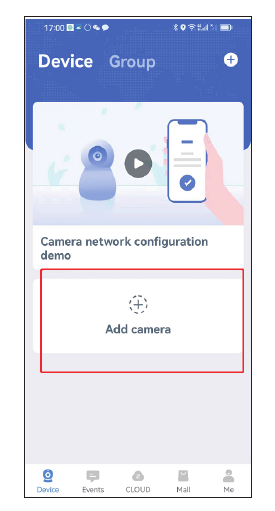
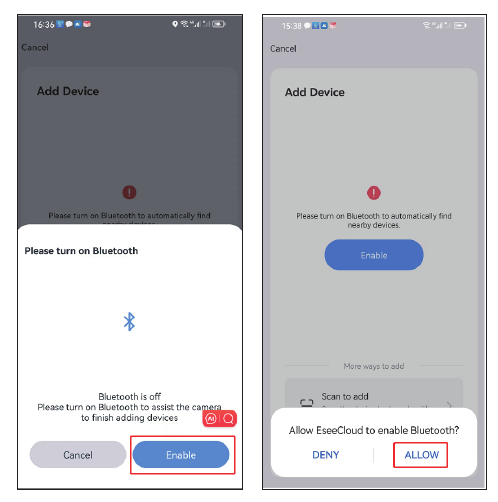
Turn on Bluetooth — tap Enable, then Allow.
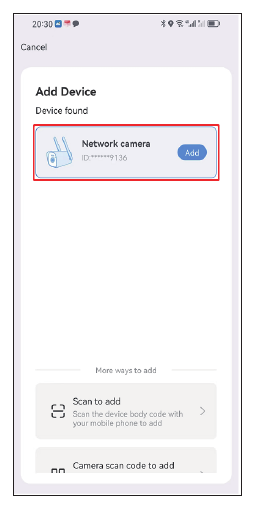
Find the new device and tap "Add".
Select your home Wi-Fi.
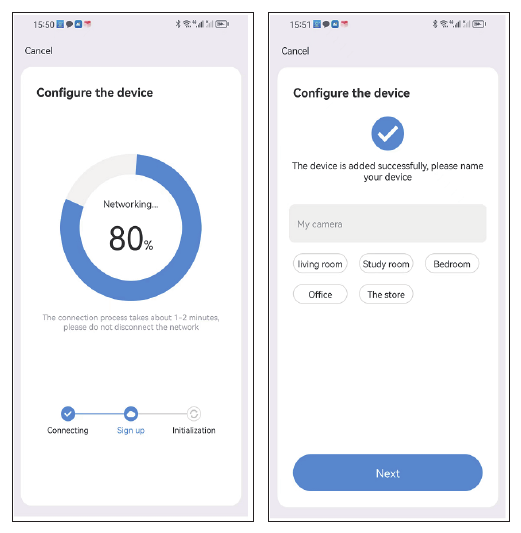
Wait for the configuration to finish, then name your camera.
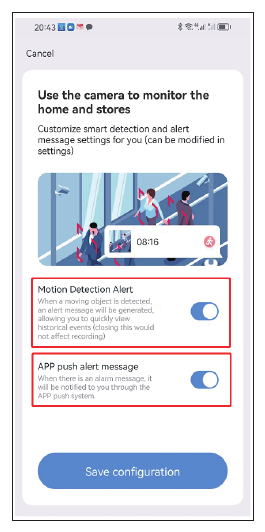
Set up the motion detection alert if you need the function.
View the Camera on a PC
You need to register an EseeCloud account on your mobile phone and add the device first; then you can view it remotely on a PC with the same account.
Download links:
- EseeCloud for Windows: EseeCloud_Setup_3.0.8.4.exe
- EseeCloud for Mac: EseeCloud-mac-2.0.8_20200228.zip
Or email [email protected] / [email protected] (for US) or [email protected] (for UK/EU).
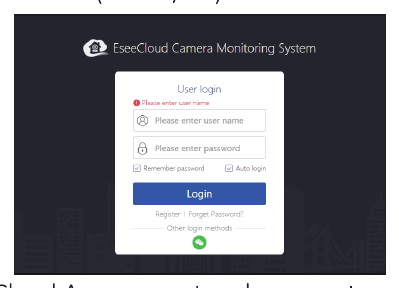
- Log in with your EseeCloud app account, which only supports email and cellphone number. If you registered with a third-party account, please register a new account by email or cellphone number, then add the system again.
- After logging in with your account and password, the device will automatically synchronize to the computer.
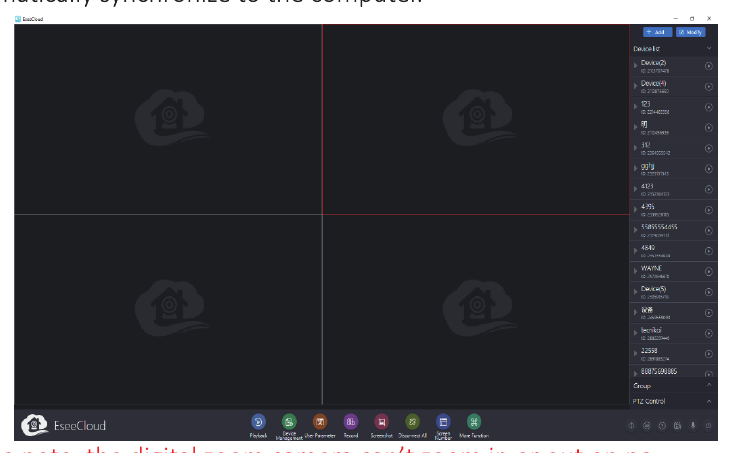
Please note, a digital-zoom camera cannot zoom in or out on a PC.
Camera Functions
1. EseeCloud Main Interface
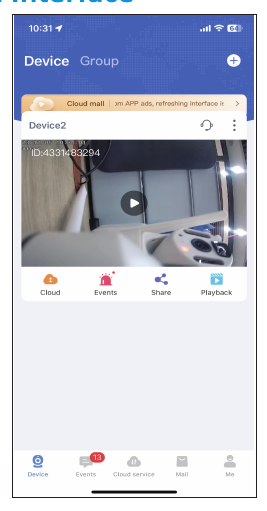
Tap the ⋮ icon and you will see four options:
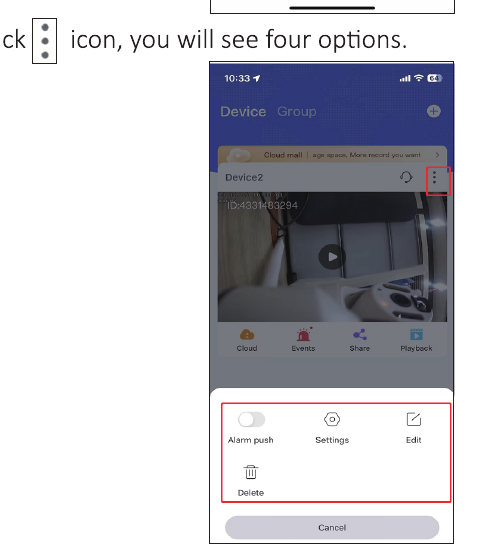
- A. Enable "Alarm push" to get phone alert notifications.
- B. Tap "Settings" to go to the setup interface directly.
- C. Tap "Edit" to edit the device name.
- D. The last option deletes the device.
Cloud
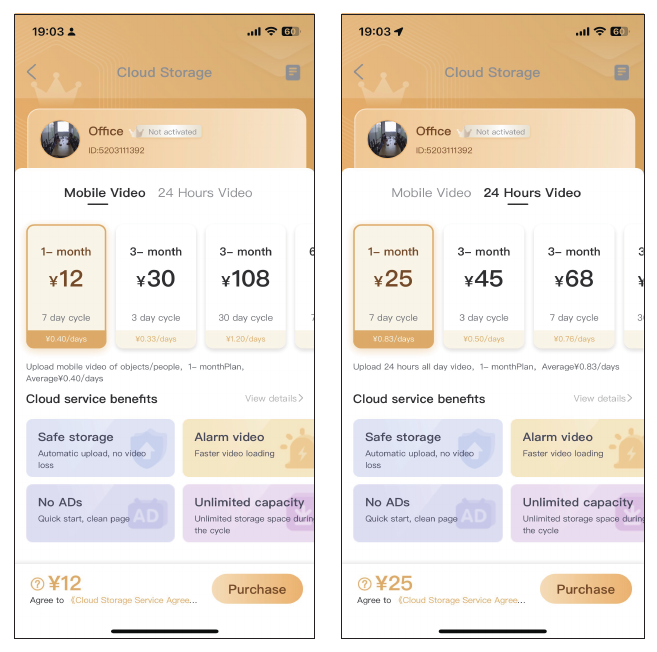
Tap the cloud service icon  to purchase cloud service; each device needs to be purchased separately. There are two kinds of storage modes:
- Mobile Video: stores video only when the camera detects a suspicious object.
- 24 Hours Video: records video 24/7.
Events
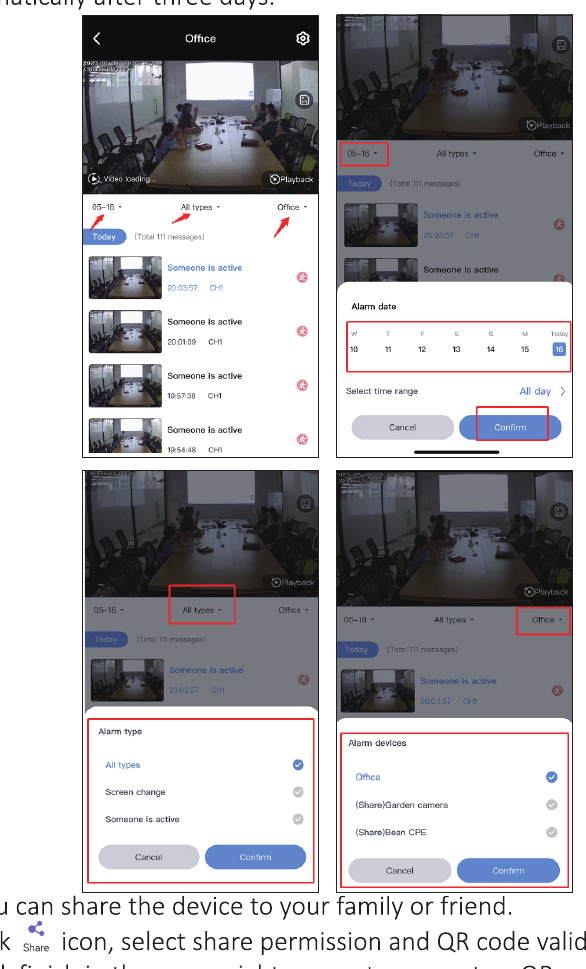
Tap the Events icon to check alarm messages. You can select the date, time, and motion type, such as "all types", "screen change", or "someone active". Alarm messages are overwritten automatically after three days.
Share
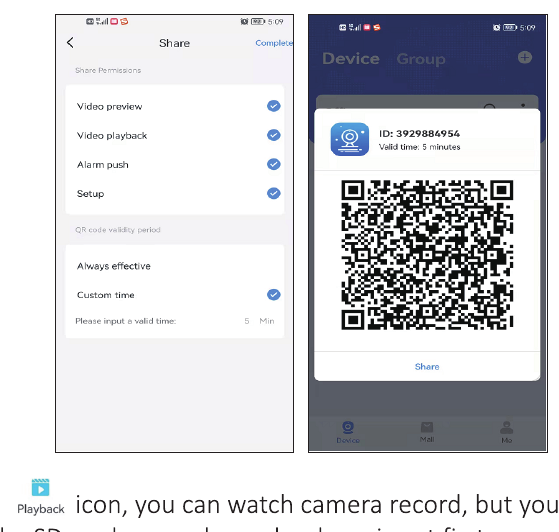
You can share the device with your family or friends.
- Tap the Share icon to set the share permission and QR code validity.
- Tap Finish in the upper-right corner to generate a QR code, then share it with other people.
- Your family or friend also needs to download the app first, then tap "Add device" and scan the code you shared.
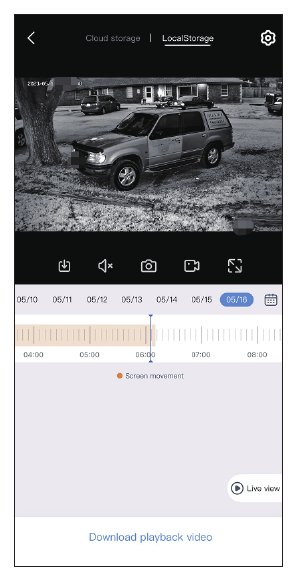
Playback
Tap the Playback icon to watch the camera record; you need to insert an SD card or purchase cloud service first.
Please note, only cloud service supports the fast-forward option; the SD card does not support it.
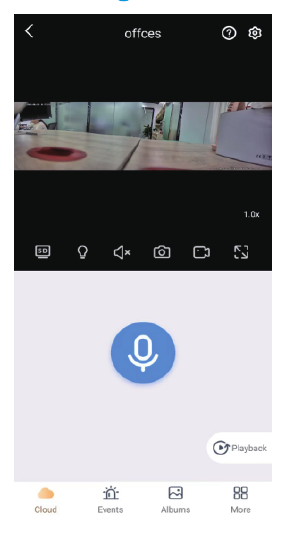
2. Real-Time Video Recording
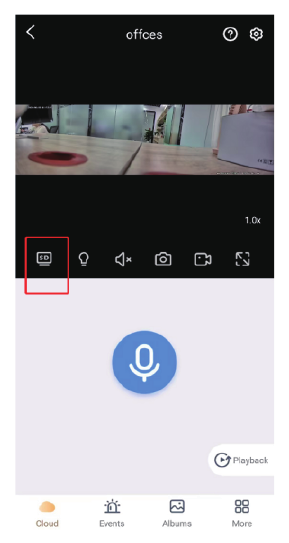
SD & HD Switch
It is set to SD mode by default to provide smoother video. If you want to set it to HD mode, please adjust it manually every time you view it.
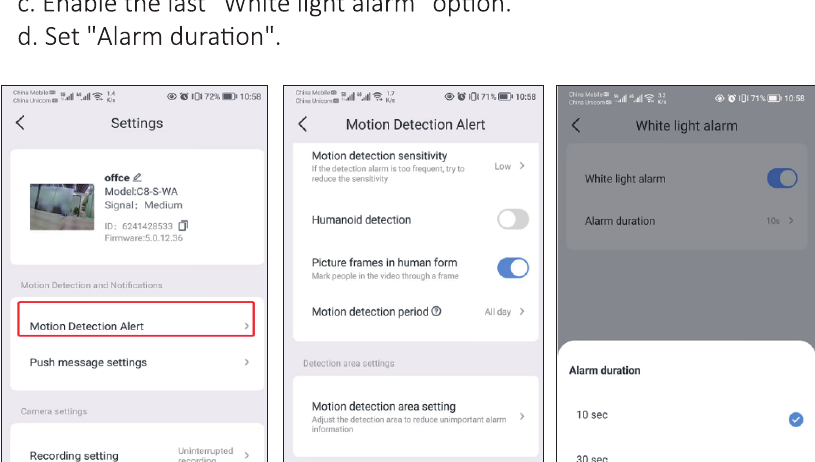
Lighting Setup
You can tap the light icon to turn on the light manually when you need it, or set it to light up automatically when there is motion. To set the automatic light alarm, follow the steps below:
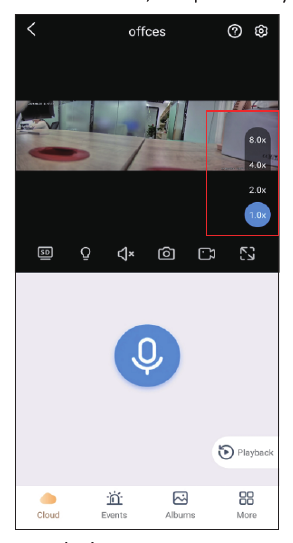
Digital Zoom
You can view the magnification here; it can be magnified 2 times, 4 times, or 8 times.
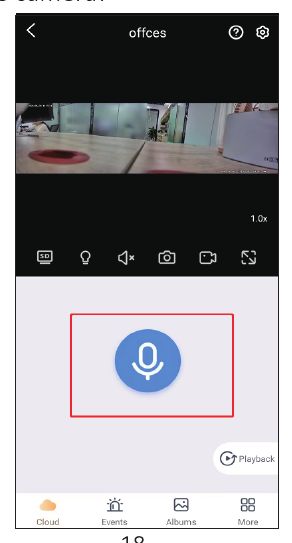
Microphone Two-Way Voice
When you long press the center microphone button, you can talk to someone outside the camera.
Work With Alexa
To use the Alexa function, open the Alexa option in the app, then follow the instructions below to connect the camera on Alexa.
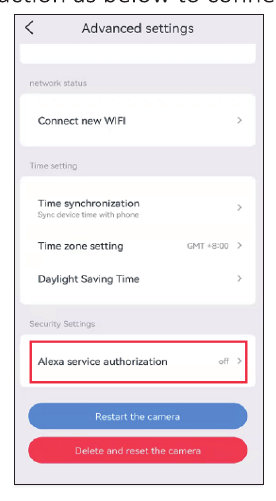
After enabling the Alexa option, go to your Alexa app and follow all the steps that the Alexa service shows.
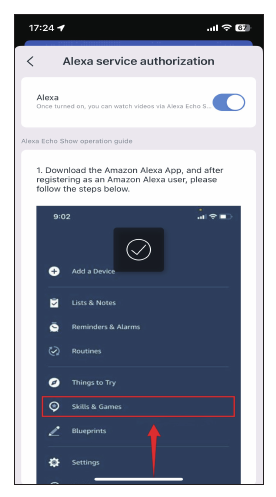
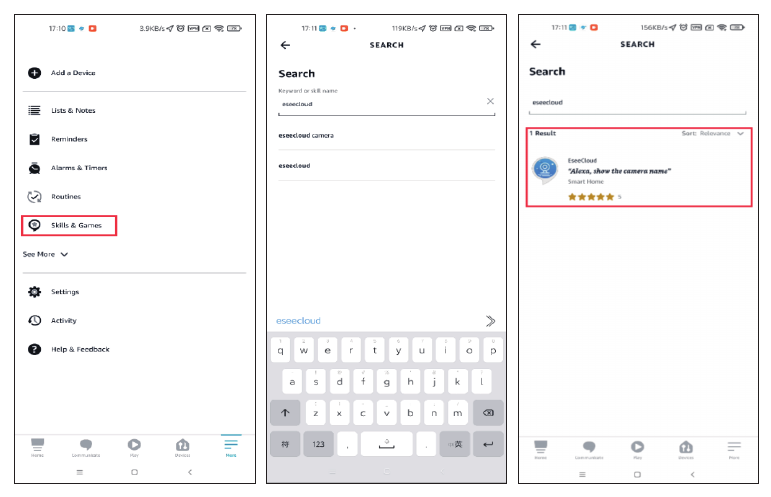
Go to More, tap "Skills & Games" → search "EseeCloud" → tap this option.
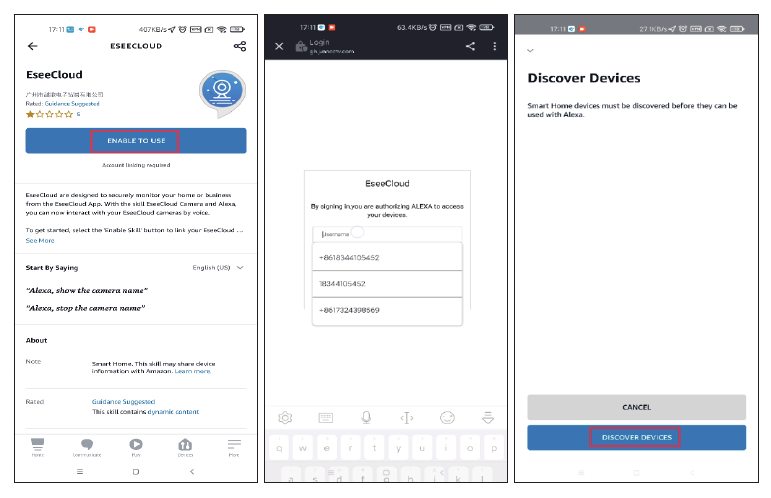
Tap ENABLE TO USE → enter your EseeCloud account and password → select DISCOVER DEVICES.
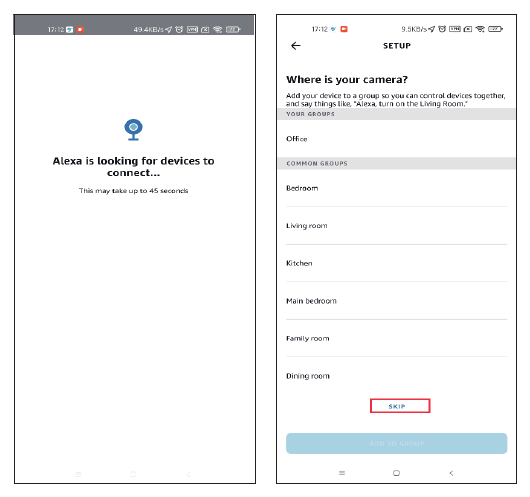
Wait about 45 seconds to find your device. After it finds your device, you can view the camera on the Echo Show.
We have uploaded a video about how to add the device to Alexa: amazon.com/vdp/02b7820dd64d4ad6a457fcfd8638e830.
- If you log in to EseeCloud through third-party software, you cannot enable the EseeCloud skill on Alexa. You need to register an EseeCloud app account through a phone number or email address.
- You need to name the device, otherwise Alexa will show that the device cannot be found.
About This Device
You can find your device ID, version, and IP address on this interface. You can also see which Wi-Fi is connected.
FAQ
Need help?
If you have any questions, please contact us:
- Email: [email protected] (For Amazon US), [email protected] (For Amazon UK&EU), [email protected] (For AliExpress)
- WeChat / WhatsApp: +86 15361562950
- Hotline: 917-338-1084 or 855-660-0999 (For US)
- Website: www.hiseeu.com
You can also browse our FAQs & Guides or contact our support team.